Thank God


Tracy wrote:

Yes, there will be more pictures. We figured it out - there's about 90 square feet of quilt there (2x7, 6x7, 2x7 and 4x5'). It also took me about 90 hours of at-the-machine-with-my-foot-on-the-pedal machine quilting. We have all sorts of numbers (how many spools of thread, yards of fabric, etc.) that we'll share. Soon.

And I realize that I didn't finish the machine quilting description, leaving you at Step 2 or something like that. I'll add that, too, if you're really all that interested.

If you want to take the trip with us from the beginning, start ta-clickin' on the Week numbers on the sidebar over there on the left.

Oh, and if there's a design or construction detail that was NOT discussed ad nauseum and you actually WANT to know about it, feel free to ask. I have a little bit more free time now, doncha know.

I am NOT amused

Tracy wrote:

Ooohh, aaahhhh


AARRGH!


For those you who don't know what you're looking at, this is the backside of the bee-yoo-tiful and complicated quilting in the first picture. There was apparently a thread tension problem. Those bright spots are little and not-so-little loops of the front (and expensive) thread pulled through to the back. This is not good. I'll need to remove all of the stitching and re-do it.

Oh, and sorry if the second picture gives you motion sickness. I really WASN'T shaking with rage (or any other emotion)... though it occurs to me that it's been quite a while since breakfast...

March 15 is National Quilting Day

Jean wrote:

The narrow top is done. Including the embroidered corners. I've started the rose center and have tested an embroidered rose for the rose window corners. Also, the extra band is sewn to the big one and a piece of batting pinned in place at the side. You don't need it for the border quilting, so I just pinned.

National Quilting Day, huh? Well, my creativity will extend to the structural quilting on the narrow one. I'll drop it by on my way home from church - certainly not on my way there!

We will get them done - notice how I keep saying that. Between the sewing, putting them up, Easter vigil and then both services on Easter, I'm looking forward to Monday the 24th!!

God Deserves Some Bling

Jean wrote:

I love working with metallic thread - it looks so elegant, so I've been playing with design elements for the narrow quilt corners and the rose window corners.


The silver and gold design (above) is the Trinity symbol. The rose is something I'm just testing - rose, rose window - get it? It's always wise to test a design on scrap fabric. That print is not really going into the quilt.


I just finished my second 500 yard spool of black thread. And started a third.

Hanging Out? Watch Out for Security!

Jean wrote:

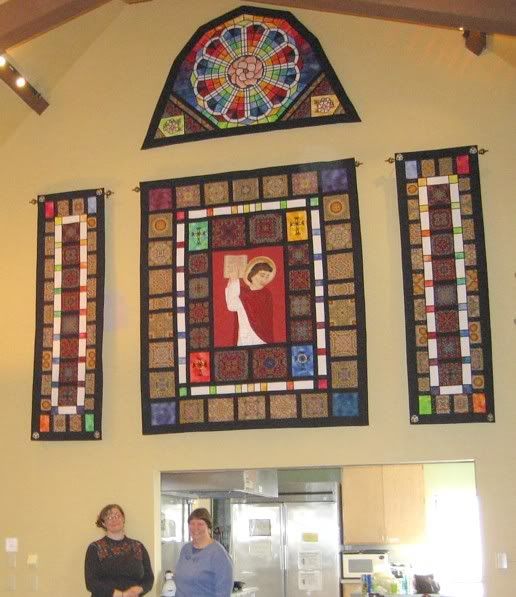
Hopefully, the quilts will be installed this Saturday, the 22nd. While the rose window quilt will be attached to a wooden frame with velcro and the frame permanently attached to the wall, this is an unusual installation to say the least. Still, if it's 14-18 feet up the wall, it probably won't be taken down weekly (or even annually) for cleaning.

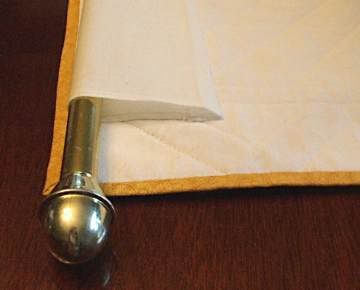
The standard way for a quilt to get "hung" is to hand sew a 4" wide open sleeve across the top, preferably down an inch or two from the very top. The picture here shows another quilt with a rod through the sleeve. The sleeve is sewn with a pleat at one edge so when mounted, the quilt will hang flat and not curl over the rod.

The size is standard for quilt shows, where the quilts are hung on wide wooden rods. The sleeve also protects the cloth of the quilt itself from stains or abrasion from the hanging rod.

In our installation, the two narrow lower quilts will have a standard sleeve, while the center larger quilt will have two sleeves with an opening between them to allow for the rod to be supported by a center support as well as at both sides. We did buy good, heavy ¾" rods, so they should not bend or bow with time.

Okay, what's this about security? Well, believe it or not, there are quilt thieves. Hard to believe, isn't it? But some quilts are like art pieces - not simply a bunch of fabric and thread, any more than a painting is a piece of paper or canvas and paint. Color, design and workmanship determine the value of quilts, as well as age for antique quilts.

There is an entire quilt appraisal industry out there. An expert appraisal is needed for any insurance value beyond the replacement value of the materials. Time doesn't count with routine insurance such as replacement house insurance or insurance when being shipped. Time only counts when it's part of an appraisal value.
People occasionally maliciously damage quilts. A few years back, a vendor at the International Quilt Festival in Houston, TX - one of the largest and most prestigious in the country - threw bleach at a quilt, which, needless to say, damaged it and the surrounding quilts quite a bit.

Why? He didn't like the naked woman portrayed on the quilt.

So what do quilters do about security? At one end is nothing - a completely anonymous quilt that says nothing about the quilt, the quilter or when or why it was created. At the opposite pole is the insertion of a grain-of-rice size microchip into the quilt, just like the ones inserted under the skin of pets in case they get lost. We haven't done that - yet - as it involves purchase, insertion and registration.

Labels are frequently attached to quilts and can contain a variety of information - the quilters' names, date of completion and perhaps the occasion. Labels should be sewn to the quilt and then quilted through to prevent unscrupulous people removing the label!

We chose two types of labels:
Embroidered Label
The stitched labels will be part of the quilt backings except for the larger rectangular quilt, which has a very artistic label done by Tracy on the front.

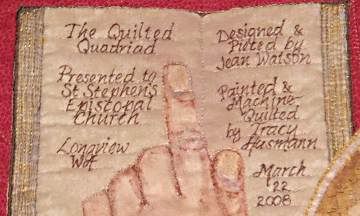
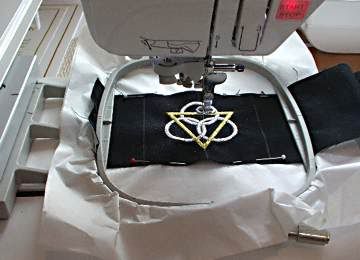
Ever wonder what St. Stephen is pointing to in the wood carving? Tracy has solved that mystery!


So our labels are integral parts of the quilts themselves, hard to remove but not as informative as the microchips. As each microchip costs $38, and I'm not sure if the registration costs anything, that may be a future security measure.

Just thought you'd want to know how we are trying to protect your investment.
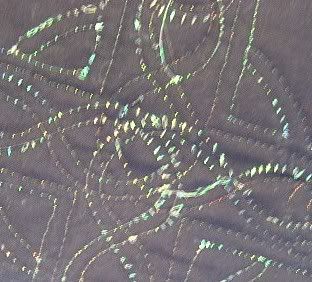
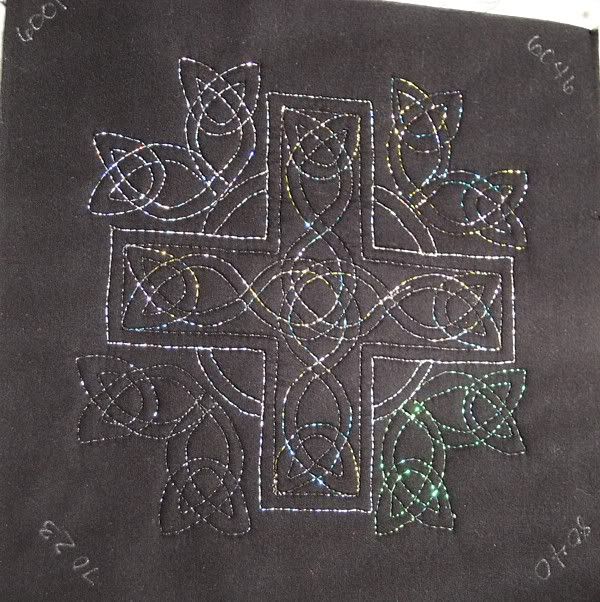
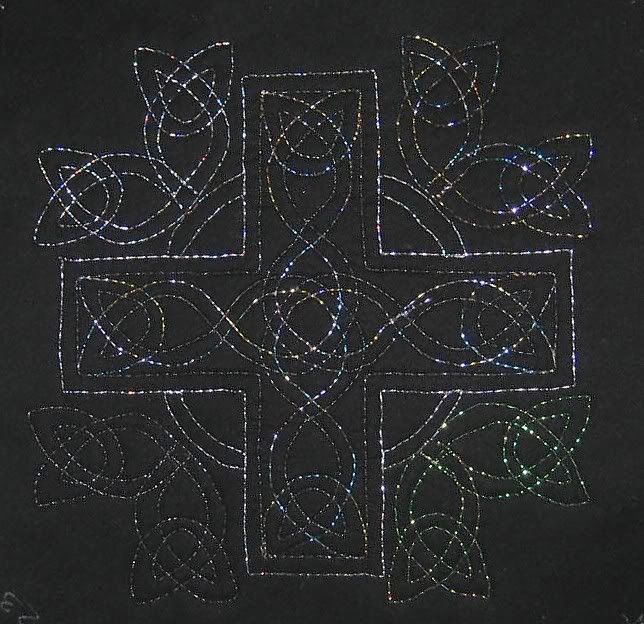
The Value (and Cost) of Quilts

Tracy wrote:

You're probably able to get a rough idea of how much time Jean and I have spent on this project. Our treasurer (and those she chooses to tell) knows how much most of the supplies cost.

The thing is, with an art quilt, there's also the art part. That's why Jean talked about professional appraisals. Yes, I know that you could just pop over to Linens ‘N Things or Wal-Mart to pick up a quilt for your guest bedroom, and you'll get (I assume) a pretty quilt that will last at least a year or so and it won't cost a lot of money.

But what if you want a hand-made heirloom? What if you have an idea of the intrinsic and historical value of a NON-mass produced quilt? Do you want art? Do you want the comfort of a 'snuggle-up' that is so lovingly created that you can feel it every time you wrap it around yourself or a loved one? (If that’s what you need, check out Jane Brunk's quilts. They're like hugs you can carry with you where ever you go - you can just FEEL the love.)

Okay,I might have gone off on a tangent there for a minute. Caryl Bryer Fallert, one of the premiere quilt artists of the 20th (and into the 21st) century, has a website that shows some of her quilts that are for sale or that have been sold. Go have a look, I'll wait (while you're there, notice the sizes and prices ::gasp!::).

Click Here to See the Art Quilts

A discussion with the artist about pricing is a serious eye-opener, in which she points out (among many, many other things) something obvious, but frequently forgotten: Skilled labor costs more than unskilled labor.

Wow. There I go again. Was there a point? Maybe not. Maybe it was to give you, dear readers, something to think about. Or maybe just an excuse to go surf the web a bit and see some pretty, pretty pictures.

NEW! The New Filing System

Tracy wrote:

Dear Readers,

The blog was becoming quite cumbersome, loading every picture and post each time you came to visit. The phrase "like an elephant skipping through peanut butter" comes to mind.

I haven't dumped any of the information, just changed the labelling so that there are 5 or 6 posts on each page, instead of the 41 there was when I had this bright idea.

The labels are cleverly titled as "week one", "week two", etc. (I guess my cleverness for the week has been used up) and you can get to them from the sidebar.

No, these really aren't posts from weeks one through whatever. They're just sets of 5 posts.

You can still click on the more descriptive labels (design, kaleidoscope, etc.) on the sidebar to get to posts that talk about those specific things.

Happy (and speedy) reading.

Let the Quilting Begin!

Tracy wrote:

Woo-hoo! I've actually done some quilting on the first panel! Look!


Okay, so it's the back of the quilt. But the first round is quilted - the straight and incredibly hidden utility quilting, to keep everything lined up and stabilized. And wow, Jean, you were right - that black fabric just sucks all of the light into itself!

Time to press, stretch, press and quilt - 200 minutes, or 3/4 of "Honor Among Thieves" audio book (abridged), by Jeffrey Archer. I expect that the next one will not take quite as long.

(Oh, and that's Keith standing on a stool behind the quilt - remember, it's over 7 feet long.)

I've also identified the quilting motifs for the border and the kaleidoscope blocks. Now to trace them all out.... !

Leading done!

Jean wrote:

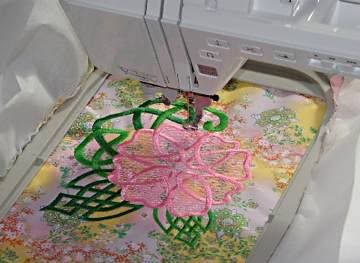
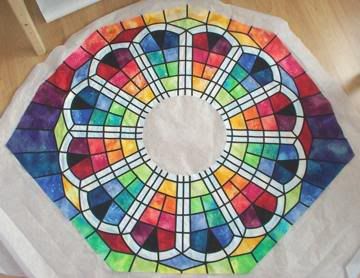
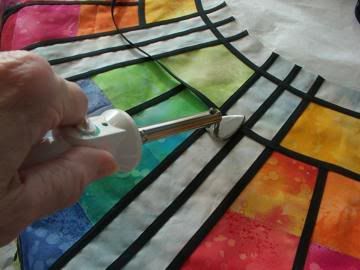
Hot dang! I finished the rose window leading. The little Clover iron was a must, as it had to fit in between the leading lines. I just left it on the entire time I was sewing down the leading so I could reattach loosened sections.

The circular leading was so easy (it was about time something was easy). Only one start and stop per circle, so I just ironed and sewed, ironed and sewed.

Boy, that black leading really eats up the light. I just aimed the needles where I wanted them to go, as my eyes could only see black. When the sun came out, I saw stitches! I'd recommend you set up your machine outside on a sunny day to do those borders!!


Spent most of yesterday morning online looking for things to put in the triangular corners of the rose window. I bought a few things as well as the scroll cross.

Auditioning Thread

Tracy wrote:

Although the utility quilting was done with black thread, the fancy quilting will be done with (mostly) fancy thread.

After dragging out some specialty threads that ranged from subtle to gaudy, Jean and I narrowed it down to a handful. After Jean went home, I narrowed it down some more (!)

click to enlarge The first thing to do is to unravel a yard or two of thread from each spool and pile it up on the quilt top.

What I was looking for was something that had zing, but didn't set off my (fairly sensitive) gaudy-alarms.

I ended up with these possibilities/probabilities:


Top two are black rayon and silver holo[graphic]-shimmer; bottom (left to right) are black metallic, rainbow holo-shimmer and opalescent holo-shimmer

Eventually the black rayon was taken out of the mix, because of that whole "suck the light out" black Kona cotton thing. The rayon would only catch the light if a) the quilt was moved around or b) the light source moved - and since I don't expect either of those things to happen once the quadriad is installed, it got rejected.

Next up was to take the threads for a test drive, to see how they held up to the cotton, and if they had the proper zing. I encourage you to click on each picture to see the larger version:

click to enlarge(This is NOT one of the motifs that will be going on the quilt.)

I quilted the motif using all four of the target threads - you can see where I've written their color number in the corners. The picture was taken in full-on sunlight so I could see maximum sparkle and determine if it was zing, or just plain gaudy.


click to enlarge

Here it is again, in less dramatic lighting. The black here is much closer to real-life.


All of the threads passed the "test" on the suck-the-light-out cotton. They also behaved in the machine - metallic threads frequently shred in the eye of the needle - and the back of the sample even looked good!

Now that I've found the right threads, my next step is to call the quilting/fabric shops to see if these specific brands and colors are carried locally. I do NOT want to get partway through and have to change threads. You know that having different threads where they are supposed to be the same would send me over the edge.

You do know that, don't you?